
Connector pin height and tip line from the side: a telecentric worked example
A worked example, not a customer project: a pin header laid on its side on a 26 mm collimated backlight and imaged by a 0.438x bi-telecentric lens shows each pin's height and the tip line as a silhouette. Every number is calculated from the parts' printed rows.
Measure pin height from the side, where telecentric optics keep near and far pins at one scale.
- Field of view (derived)About 19.3 × 16.1 mm
- Sampling (derived)About 7.9 µm per pixel
- Working distance (lens spec)73 ± 1 mm
- Depth of field (lens spec)± 2.3 mm @ F11
Explore it in 3D

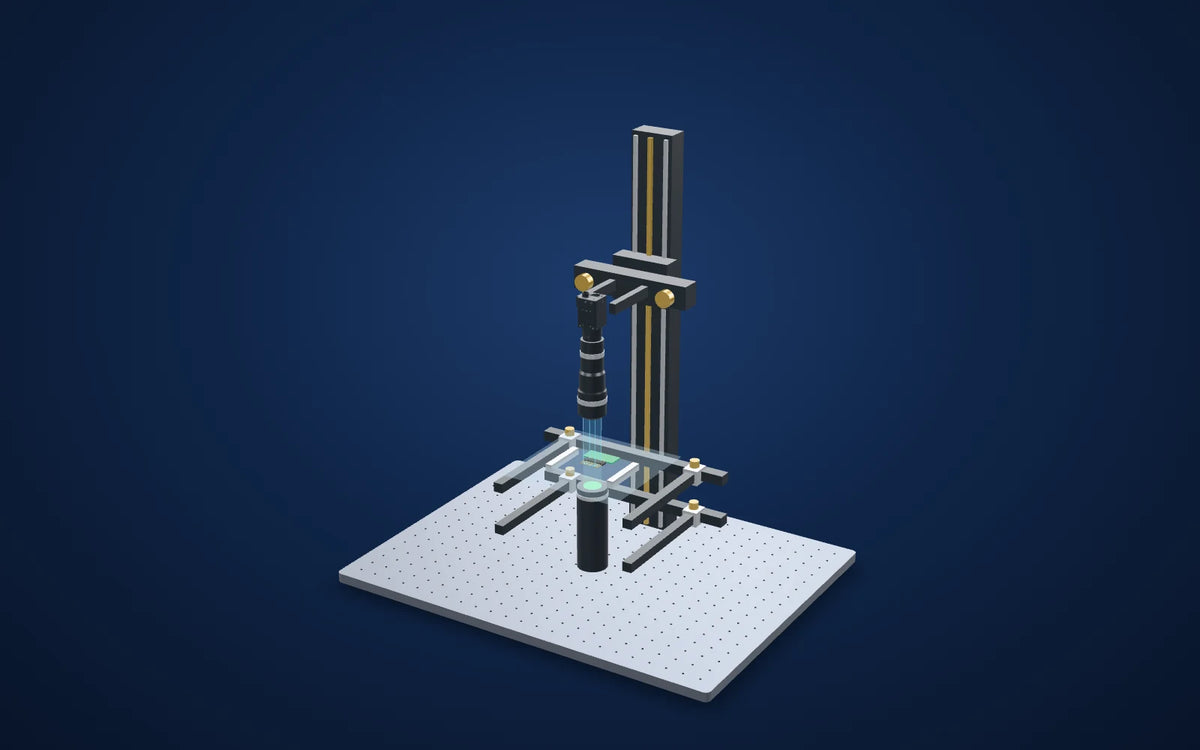
Camera CAD is the published model. Lens and light envelopes use printed dimensions. The linked station uses its published base size and column height; carriage, brackets, fittings, the part and spacing are illustrative. Confirm load, travel, fasteners and clearances before ordering. Light paths explain the arrangement and do not simulate optical performance. The part is a generic example, not a real customer part.
The challenge
Pin height above the housing and a straight tip line decide whether a connector seats on the board. Seen from above, a pin that is too short looks the same as a good one.
In side view the pins lie at slightly different distances from the lens. With a conventional lens the nearer pins look taller, which reads as a height error.
How it was solved
The LS-TCL-2678 prints 0.438x, 73 ± 1 mm working distance and ± 2.3 mm depth of field at F11. With the MV-CS050-10GM(NPOE) sensor of about 8.45 × 7.07 mm the field is about 19.3 × 16.1 mm: about seven pins at 2.54 mm pitch fit along its long side.
The LS-CLM-0066 is the lens's printed matching light: a 26 mm collimated beam, which covers the field diagonal of about 25.1 mm, and a 23-46 mm light working distance. The header lies on its side on the glass tray of the LS-MNT-0097 station so the pins stand out against the beam.
Why it works
- 1
Sampling is about 3.45 µm / 0.438 = 7.9 µm per pixel, so a 0.64 mm square pin spans about 81 pixels and a 0.1 mm height step about 13. Repeatability has to be shown on real parts.
- 2
Telecentric imaging keeps nearer and farther pins at nearly one scale within the printed ± 2.3 mm depth of field. In a two-row header the rear row stands 2.54 mm behind the front row and is hidden by it in silhouette, so each row needs its own view.
- 3
The silhouette shows height and the tip line; it does not show plating, burrs on the pin faces or contamination.
Worked application example (calculated, no test image)
Evidence you can inspect
No camera image is shown. This is a worked example built from catalog rows, not a test of a real part.
Nothing is reported as measured. Field, sampling and light coverage are calculated from the lens's printed magnification, working distance and depth of field, the camera's printed pixel count and pixel size, and the light's printed beam diameter.
The numbers describe what the optics sample, not a measurement uncertainty or a detection limit. Run a trial and a measurement study with real parts before relying on any tolerance.
From image contrast to a production decision
What to validate on your part
- 01
Calibrate the scale
Image a traceable step or pin gauge at the pin plane.
- 02
Check the seating
Reload headers, turn them end for end and vary their position across the field and in depth.
- 03
Run a measurement study
Compare pin heights with a reference instrument and assess repeatability at the height limits.
From the demo to your test bench
Parts in this setup
 Bi-telecentric lensOur pick
LS-TCL-2678
Bi-telecentric lens for 2/3" cameras, 0.438x, WD 73 mm, C-mount (LS-TCL-2678)
0.438x, 73 ± 1 mm working distance, ± 2.3 mm @ F11 depth of field and an 11.4 mm maximum sensor size, as printed.
$1,399.00
In proposed setup
 Collimated lightOur pick
LS-CLM-0066
Collimated (telecentric) illumination, beam dia. 26 mm, length 124.8 mm (LS-CLM-0066)
Printed 26 mm beam (covers the field diagonal of about 25.1 mm) and 23-46 mm light working distance. Green shown; red, blue and white versions are listed.
$489.00
In proposed setup
 CameraOur pick
MV-CS050-10GM(NPOE)
Hikrobot MV-CS050-10GM(NPOE) 5 MP GigE area scan camera, IMX264, Gen 2 basic version, Mono, Without PoE
Monochrome C-mount camera, 2448 × 2048 px of 3.45 µm (printed); its sensor diagonal of about 11.0 mm is within the lens's 11.4 mm limit.Not available in the United States. Available for delivery to other countries.
$819.00
In proposed setup
 Camera test stationOur pick
LS-MNT-0097
Camera stand with XZ adjustment and glass tray, height 600 mm, 600 x 450 mm base (LS-MNT-0097)
600 mm column, 600 × 450 mm breadboard, XZ adjustment, glass tray and two lighting holders as listed. Proposed bench fixture; confirm loads, travel and camera/lens clamps.
$1,309.00
In proposed setup
"Tested" marks the part the manufacturer used in its application test. "Our pick" is our proposed alternative or supporting part, not tested by the manufacturer in this set-up. Confirm colour, optics, controllers, power supplies, cables and mounting before ordering.
The set-up
| Lens | LS-TCL-2678 · bi-telecentric · 0.438x · C-mount |
|---|---|
| Light | LS-CLM-0066 · collimated · 26 mm beam |
| Camera | MV-CS050-10GM(NPOE) · 2448 × 2048 px · 3.45 µm |
| Working distance | 73 ± 1 mm (lens spec) |
| Field of view (derived) | About 19.3 × 16.1 mm: 2448 × 2048 px × 3.45 µm / 0.438x |
| Mounting (proposed) | LS-MNT-0097 · camera test station with glass tray and two lighting holders |
Mount the optics with intent
The station is an optical test bench, with its two lighting holders included in the catalog listing. The 3D column and base follow the published height and footprint. Carriages, clamps and part supports are schematic: confirm camera screw pattern, lens support, light fasteners, permissible load and actual travel before ordering.
Complete the electrical system
This collimated light prints DC 3 V with 350 mA operating current at 1 W and 750 mA at 3 W (1000 mA maximum): it needs a constant-current driver set to those values. Confirm current, colour, connector and power before selecting a controller; a general 24 V voltage controller is not a substitute. Camera cables and PC are separate selections.
Build this system
Start from this setup, adapt it to your part.
The configurator opens with this study's camera, lens, light and station picked. Swap any part, check fit and price, then buy or ask for a quote.
Camera CAD is the published model. Lens and light envelopes use printed dimensions. The linked station uses its published base size and column height; carriage, brackets, fittings, the part and spacing are illustrative. Confirm load, travel, fasteners and clearances before ordering. Light paths explain the arrangement and do not simulate optical performance. The part is a generic example, not a real customer part.
Electronics and devices
Related case studies

 Electronics and devices
Bent pins on connectors and boards
Separate real pin lean from perspective.Field of view50.46 × 37.85 mmExplore the study

 Electronics and devices
Black-painted metal under a flat dome
Make the reflected field consistent before calling a surface defect.Proposed light housing (spec)140 × 140 × 11.5 mmExplore the study

 Electronics and devices
Buzzer polarity mark
Find the round outline first, then use the mark for rotation.Light in sourceLS-CXL-0124 · blueExplore the study
Make the next trial specific.
Tell us the part size, smallest defect or tolerance, available working distance, material and line speed. Include what a good part and a reject look like.
Worked application example (calculated, no test image): No camera image is shown. This is a worked example built from catalog rows, not a test of a real part. The numbers describe what the optics sample, not a measurement uncertainty or a detection limit. Run a trial and a measurement study with real parts before relying on any tolerance.