
Bottle caps: image a code on the cap side with an 850 nm infrared ring light
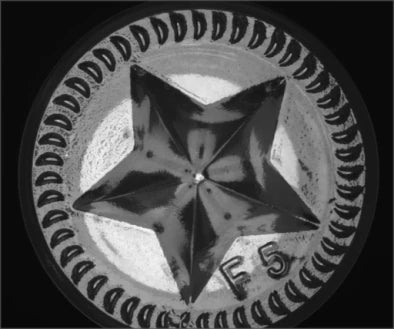
The source image shows the ribbed side of a dark bottle cap under an 850 nm infrared ring light. A two-line date and time code reads as bright characters on the dark cap.
Check the code at 850 nm on your own caps before choosing the light.

 Manufacturer test image
- Light in source74 mm 850 nm ring (not in catalog)
- EvidenceManufacturer test image
- Imaging kitLight, camera, lens and fixture proposed
- AcceptanceValidate on representative parts
Explore it in 3D

Camera and available lens CAD are published models. Lens and light envelopes use printed dimensions. The linked station uses its published base size and column height; carriage, brackets, fittings, parts and spacing are illustrative. Confirm load, travel, fasteners and clearances before ordering. Light paths explain the arrangement and do not simulate optical performance. Representative part geometry is illustrative, not reconstructed inspection evidence. The specimen and lighting distance are representative, not dimensions or settings recovered from the source capture.
Lighting manufacturer's catalog test image
What the camera saw
Images from the manufacturer's application test, cropped; the original annotations are kept and nothing is generated or enhanced. Drag a comparison slider, or open any image full size.
The challenge
Codes on the side of a cap are printed on a narrow, curved, ribbed surface, so the ribs break up the characters.
The source captions it as an invisible-character inspection and gives no visible-light image for comparison.
How it was solved
The source used a 74 mm, 850 nm infrared ring light. That light is not in our catalog: the proposed kit uses the 850 nm ring LS-RNG-0344, which is larger (OD 90 mm, 82 mm luminous diameter), so angle and distance must be confirmed on real caps.
Read the code with the proposed NIR-enhanced monochrome camera. The source does not name its camera, lens or reading software.
Why it works
- 1
Some inks and cap materials look different at 850 nm than in visible light, which can make a faint code readable.
- 2
A ring around the lens lights the curved side from several directions and evens out the ribs; the source gives no comparison with visible light.
Lighting manufacturer's catalog test image
Evidence you can inspect
Two lines of bright characters, a date and a time, are readable on the ribbed side of a dark cap.
The source captions the example invisible-character inspection on a bottle cap and identifies a 74 mm, 850 nm infrared ring light.
One source capture, made with a light that is not in our catalog. No visible-light comparison, ink type, read rate or cap size is supplied.
From image contrast to a production decision
What to validate on your part
- 01
Compare with visible light
Image the same caps under the infrared ring and under white light to confirm the gain is real for your ink.
- 02
Cover the whole code
Check codes printed at different positions around the cap and over the ribs.
- 03
Measure reader outcomes
Record correct reads, no-reads and wrong reads on a separate labelled set.
From the demo to your test bench
Parts in this setup
 LightOur pick
LS-RNG-0344
82 mm IR light (LS-RNG-0344)
Proposed 850 nm infrared ring light at the source's wavelength. It is not the source light: the source used a 74 mm ring; this one is OD 90 × ID 44 × H 20 mm with an 82 mm luminous diameter (printed), 12 W. Confirm the code is equally readable at your angle and distance.
$279.00
In proposed setup
 CameraOur pick
MV-CS050-60GN
Hikrobot MV-CS050-60GN 5MP Area Scan Camera, GigE, 2nd Generation, NIR enhanced
5 MP NIR-enhanced monochrome global-shutter camera (2448 × 2048, 3.45 µm pixels) proposed because the source light is an 850 nm infrared light. Confirm sensitivity and exposure at that wavelength; the source does not name its camera.Not available in the United States. Available for delivery to other countries.
$819.00
In proposed setup
 LensOur pick
LS-FFL-1456
35 mm, F2.8, 1.1", C-mount, Macro lens (59 mm (-0.7X) to 150 mm (-0.25X)) (LS-FFL-1456)
Proposed 35 mm C-mount macro lens at its printed 0.25x magnification / 150 mm working-distance pair. The proposed 2448 × 2048 sensor with 3.45 µm pixels gives a derived 33.7824 × 28.2624 mm field; confirm focus, coverage and residual distortion on the real sample.
$339.00
In proposed setup
 Camera test stationOur pick
LS-MNT-0097
Camera stand with XZ adjustment and glass tray, height 600 mm, 600 x 450 mm base (LS-MNT-0097)
600 mm column, 600 × 450 mm breadboard, XZ adjustment, glass tray and two lighting holders as listed. Proposed bench fixture; confirm loads, travel and camera/lens clamps.
$629.00
In proposed setup
"Tested" marks the part the manufacturer used in its application test. "Our pick" is our proposed alternative or supporting part, not tested by the manufacturer in this set-up. Confirm colour, optics, controllers, power supplies, cables and mounting before ordering.
The set-up
| Light in source | 74 mm, 850 nm infrared ring light; not in our catalog. Proposed: LS-RNG-0344, 850 nm |
|---|---|
| Source camera / lens | Not specified in the source image caption; proposed parts below |
| Proposed lens point | 0.25x at 150 mm, printed lens pair |
| Derived proposed field | 33.7824 × 28.2624 mm = sensor dimensions / 0.25x; not a source test field |
| Ring envelope (printed) | OD 90 × ID 44 × H 20 mm; 82 mm luminous diameter |
| Mounting (proposed) | LS-MNT-0097; 600 mm column, 600 × 450 mm base, glass tray and two included lighting holders |
Mount the optics with intent
The station is an optical test bench, with its two lighting holders included in the catalog listing. The 3D column and base follow the published height and footprint. Carriages, clamps and part supports are schematic: confirm camera screw pattern, lens support, light fasteners, permissible load and actual travel before ordering.
Complete the electrical system
Select a controller against the exact light voltage, drive mode and power, then confirm camera data/power/I/O cables and a suitable PC. These are not silently added to the proposed optical kit.
Build this system
Start from this setup, adapt it to your part.
The configurator opens with this study's camera, lens, light and station picked. Swap any part, check fit and price, then buy or ask for a quote.
Camera and available lens CAD are published models. Lens and light envelopes use printed dimensions. The linked station uses its published base size and column height; carriage, brackets, fittings, parts and spacing are illustrative. Confirm load, travel, fasteners and clearances before ordering. Light paths explain the arrangement and do not simulate optical performance. Representative part geometry is illustrative, not reconstructed inspection evidence. The specimen and lighting distance are representative, not dimensions or settings recovered from the source capture.
Packaging, labels and print
Related case studies

 Packaging, labels and print
Indentation marks on aluminium film
Make a surface change visible before deciding whether it exceeds the specification.Proposed light housing (spec)340 × 48 × 75 mmExplore the study

 Packaging, labels and print
Bottle-base mould code
Diffuse dome light evens out the curved base so the moulded code can be read.Light in sourceLS-DOM-0094 · whiteExplore the study

 Packaging, labels and print
Foreign matter in a bottle bottom
Build the clean-bottle variation into the test before setting a dark-spot threshold.MethodTransmitted white backlightExplore the study
Make the next trial specific.
Tell us the part size, smallest defect or tolerance, available working distance, material and line speed. Include what a good part and a reject look like.
About this case study: the photos and camera images are the manufacturer's application test images, supplied by the maker of the tested part and taken on the parts shown; LumaSpec did not run this test. Your results depend on your part, camera and set-up. This is a manufacturer's application study, not a LumaSpec customer deployment. Reported figures are the manufacturer's; proposed components require a fresh trial. The 3D scene illustrates the arrangement and does not simulate imaging performance.